
Introduction
Label StoreMax is a mobile app template that integrates with WooCommerce to provide a mobile e-commerce experience for customers. Once your (WooCommerce) store is connected to WooSignal, your customers will be able to browse products, categories, make purchases (with one of the payment gateways) and log in using WP JSON API.
You can upload this app template to the App Store or Google Play Store (with your developer accounts). We also offer a service to upload the app on your behalf, link here to view.
This app template uses Flutter, an open-source UI software development kit created by Google. You can configure and do custom development in the source code using dart.
The contents of our documentation here will help you get started, if you have any questions please feel free to contact us
Folder Structure
Label StoreMax is available to download with a Plus membership, once you've downloaded the file, extract the zip. You should have the below file structure:
| LabelStoreMax | Contains the app, open using Android Studio/VSCode |
| LICENSE | License for using Label StoreMax |
| README.md | Information about Label StoreMax |
Requirements
To quickly get setup, you'll need to ensure that you have the below requirements.
- WordPress 4.4+
- WooCommerce Store 3.5+
- Android Studio (Download here)
- Flutter (Download here)
Connecting WooCommerce
Follow the below steps to connect your WooCommerce store:
- Login to your WooSignal account (or create an account if you are new).
- On the Dashboard, if you have not connected your store, it will display "Offline". This means you will need to connect your WooCommerce store, click "Connect Your Store" and add the URL for your WooCommerce store e.g. https://www.outdoorshoes.com. Once added, click "Connect store".
- It will ask you to authorize WooSignal for "read/write" access to connect with your WooCommerce store. After you've authorized WooSignal's access, the dashboard will show "Online" which means your store is now connected!
Android Studio (Flutter set up)
Once you've downloaded Android Studio, follow the below steps to help you get started
Mac
Use the following instructions for macos:
- Start Android Studio.
- Open plugin preferences (Configure > Plugins as of v3.6.3.0 or later).
- Select the Flutter plugin and click Install.
- Click Yes when prompted to install the Dart plugin.
- Click Restart when prompted.
Linux or Windows
Use the following instructions for Linux or Windows:
- Open plugin preferences (File > Settings > Plugins).
- Select Marketplace, select the Flutter plugin and click Install.
Running the app
First open Android Studio and select File > Open, this should bring up a new window to open a project. Next, navigate to where Label StoreMax was stored on your computer and open "LabelStoreMax".
When you open Label StoreMax for the first time you will need to run the below command to ensure the Flutter version and project is ready.
Note. you should have completed the above requirements before doing this step.
flutter clean && flutter channel stable && flutter upgrade && flutter doctor -v && flutter pub get
This will take a minute or so to finish, if you have any issues after running the above command, check the console log for the error.
Next, try to build and run the project. In Android Studio, you can open a simulator for IOS or Android and click the play button to start a fresh build.
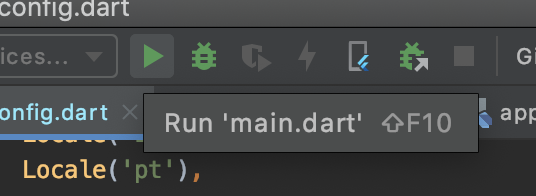
This will build the app onto the simulator/emulator on your computer. To test on a real device make sure you have a developer account set up and your device is registered.
If you are having trouble building the app, ensure that your Flutter version is up to date and check for errors with the below command
flutter doctor -v
Configuring Label StoreMax
- Connecting your app
- Change currency
- Payment methods
- Change app name
- Change app icon
- Change app language
- WordPress login
- Push Notifications
Connecting your app
If you have followed the above steps, you should now be able to connect your app to WooSignal.
Note. If you have downloaded Label StoreMax from WooSignal then this value might already be set for you.
Using Android Studio, open the project and edit the "/.env" file in the project.
Once you've opened the "/.env" file, you should see a variable named APP_KEY="". Update it with your app key from WooSignal.
You can find your app key here by selecting the API Token tab. Copy your app key and then paste it as your APP_KEY="" in the .env file for the app template like the below example.
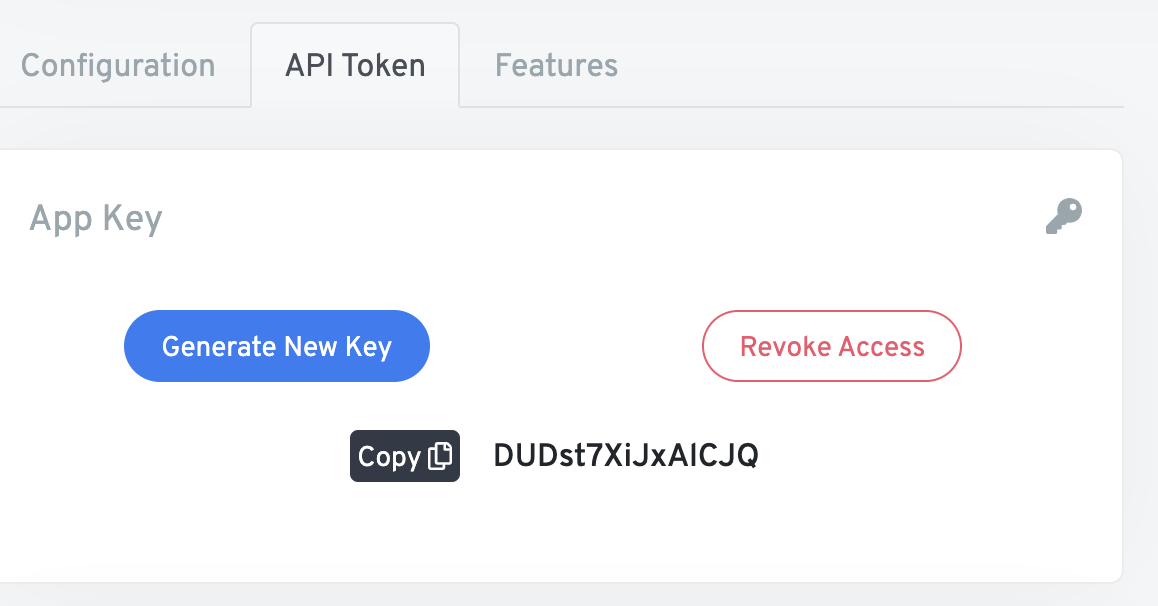
APP_KEY="your app key"
Change currency
When a customer places an order using the app, it will use the currency defined in the WooSignal dashboard.
Navigate to the dashboard and select a store that you've connected to WooSignal.
In the Configuration tab, look for Settings. This will contain a Currency list you can choose from.
Once you've updated it here, the app will automatically switch to using that payment currency for orders placed.

Payment methods
Label StoreMax gives you the flexibility to set which payment gateways you want to use. You can add one or multiple payment gateway options that will show to customers during the checkout.
To get started, first, open the Label StoreMax project (with Android Studio) and navigate to /lib/config/app_payment_gateways.dart
This will open the config for payment gateways in the app
Note. Label StoreMax comes with Stripe, Cash on delivery and RazorPay ready to configure. You can also add custom payment gateways with some development.
Here are the available payment gateways that you can use out of the box. The Key is what you reference in the app configuration to add it to your payment gateways.
| Name | Key | Description |
|---|---|---|
| Stripe | Stripe | Accept payments using your Stripe account. You can get started with Stripe here |
| Cash on delivery | CashOnDelivery | Cash on delivery (COD) is a type of transaction where the recipient pays for a good at the time of delivery rather than using credit. |
| Razor Pay | RazorPay | Accept payments using your Razor Pay account. You can get started with Razor Pay here |
| PayPal | PayPal | Accept payments using your PayPal account. |
Updating the payment methods available
- Open /lib/config/app_payment_gateways.dart
const app_payment_gateways = ["Stripe"]; // update this value
// Example:
const app_payment_gateways = ["CashOnDelivery", "RazorPay"];
Change app name
To update the app name you can follow these steps:
IOS
- Open the Label StoreMax project using Android Studio
- Open "ios > Runner > info.plist"
...
<key>CFBundleName</key>
<string>Label StoreMax</string> // Edit this value
Android
- Open the Label StoreMax project using Android Studio
- Open "android > app > src > main > AndroidManifest.xml"
...
<application
        android:name="io.flutter.app.FlutterApplication"
        android:label="Label StoreMax" // Edit this value
Change app icon
Create an app icon with the dimensions of 1024x1024px (for the best results).
Add the app icon to "/public/assets/app_icon/" directory and replace the "appicon.png" with your app icon. It's important that the app icon is named "appicon.png".
Next, run the below command of the terminal
flutter pub run nylo_framework:main appicons:build
This will generate icons for IOS and Android.
If you want more control over the icons check out this link.
Change app language
You can update the app to any of the following languages:
| Language | Key (for the app) |
|---|---|
| English | en |
| Spanish | es |
| Portuguese | pt |
| Italian | it |
| Hindi | hi |
| French | fr |
When you update the app language, it will convert all the text (in the app template) to the language selected.
This allows you to convert the app into a French localize app or Portuguese for example.
To change the language, follow these steps:
- Open Android Studio and open the project (Label StoreMax)
- Navigate to /lib/config/app_locale.dart
- Edit: the below variable with one of the Key's above. e.g. Locale('es')
const Locale app_locale = Locale('en'); // update this with one of the keys
Then, run the app to see the changes
Adding languages
You can support more languages for the app by opening the /lang folder and creating your own localized file.
First, name the file after the country you want to support e.g. zh.json (Chinese).
Make sure you create the file in the /lang directory and then copy the contents of one of the other localized files e.g. en.json and paste it into your new file.
After you've done this, you'll need to update all the values for the language you want to support.
Example
// e.g. change "Kategorien" and "Geschäft" into the language you want
{
  "Categories": "Kategorien",
  "Shop": "Geschäft",
  ...
}
Once, you've localized your new file, open the pubspec.yaml file and insert the new file under assets like the below example.
assets:
    ...
    - lang/zh.json // your new lang file
Lastly, open app_locale.dart and modify the below variable to contain the key for your new file.
Example
const List<Locale> app_locales_supported = [
  ...
  Locale('zh'), // add your new key
];
To use the new lang file, update the const Locale app_locale = Locale('en'); with your new lang key and run the app to see the changes.
WordPress Login
The WordPress login feature will allow customers to login/register, manage their orders and shipping details from the app.
Requirement:
- Plus membership with WooSignal
- You must have WP Json API installed on your WordPress site.
To enable WordPress Login, first go to the dashboard here and select the Features tab.
In the features tab, look for "WP LOGIN" and click the switch to enable it.
Once you've enabled it, you should have some options.
- Store Base Url: This should match the URL for your WooCommerce store
- Store Forgot Password Url: This should match your forgotten password URL on your WordPress site
- WP API Path: Is this the API path, by default you shouldn't need to change this
If everything is set up correctly you can re-run the app and if you tap on the menu icon in the top left it will have a new "Profile" option
Push Notifications
The easiest way to add push notifications to the app is by using the OneSignal service.
This requires some configuration but you can follow their documentation to help you integrate push notifications into the app.
Stripe
To connect Stripe to Label StoreMax you will need to first login to WooSignal. On the dashboard, you will need to connect your Stripe account here.
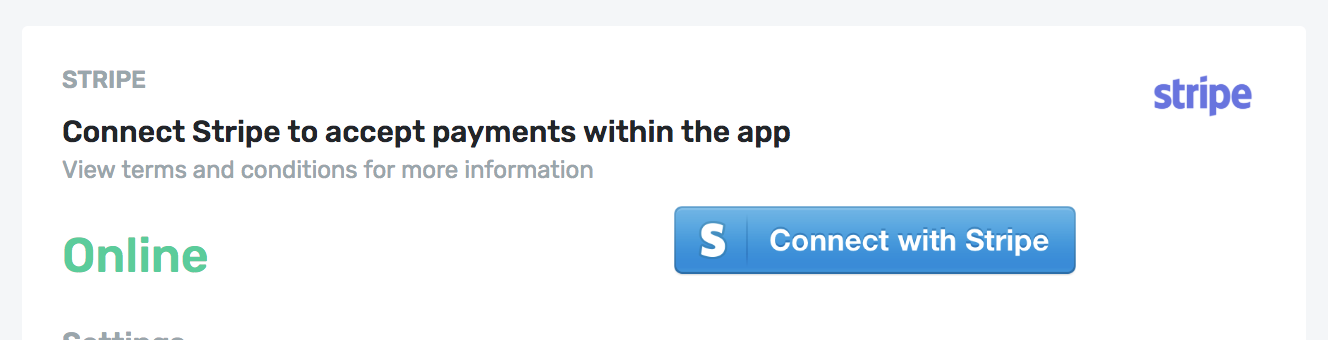
Follow Stripe's onboarding guide, this will authorize WooSignal to connect with your Stripe account.
Once the account is connected it should show "Online" in green which means it was successfully connected.
The next step is to copy your Stripe Account and add the value into the app.
To add the Stripe Account value to the app, follow the below steps:
- Using Android Studio, open the project and edit the "/.env" file in the project.
- Find the STRIPE_ACCOUNT="" variable.
- Change the value to your Stripe Account value from WooSignal here.
Example below
STRIPE_ACCOUNT="your WooSignal Stripe Account from the dashboard"
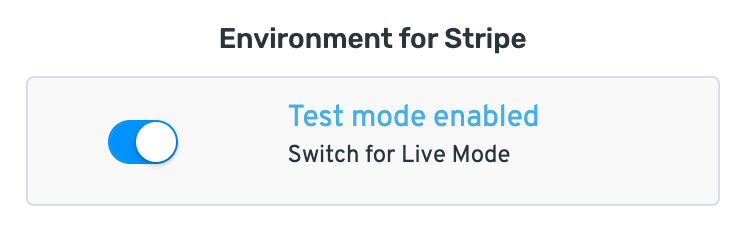
Note: To change the environment to live you will need to turn off "test mode" in WooSignal
Cash On Delivery (COD)
To enable Cash On Delivery, go to the "/lib/config/app_payment_gateways.dart" file and then look for the below variable.
const app_payment_gateways = ["Stripe"];
Update it to use Cash On Delivery with the following changes:
const app_payment_gateways = ["CashOnDelivery"];
Now, if a customer selects the Cash On Delivery method from with the app it will use the "/lib/app/providers/cash_on_delivery.dart" file to trigger a Cash On Delivery checkout.
PayPal
To enable PayPal, go to the "/lib/config/app_payment_gateways.dart" file and then look for the below variable.
const app_payment_gateways = ["Stripe"];
Update it to use PayPal with the following changes:
const app_payment_gateways = ["PayPal"];
Next open /.env
Edit the below variable with your PayPal details like the below example.
PAYPAL_ACCOUNT_EMAIL="mystore@business.com" // paypal email
PAYPAL_LIVE_MODE="false" // set true for live
Now, if a customer selects the PayPal method from with the app it will use the "lib/app/providers/paypal_pay.dart" file to trigger a PayPal checkout.
Custom Payment Gateways
If you want to add a custom payment gateway to the app this section will help you understand how to implement one.
First open "/lib/config/app_payment_gateways.dart" (this file contains the configuration settings for payments in the app).
///
List<PaymentType> paymentTypeList = [
  addPayment(
    PaymentType(
      id: 1,
      name: "Stripe",
      desc: "Debit or Credit Card",
      assetImage: "dark_powered_by_stripe.png",
      pay: stripePay,
    ),
  ),
...
A PaymentType consists of the following:
| id | ID of the payment gateway, should be unique from the other payment gateways |
| name | Name of the payment gateway e.g. "PayPal". This key is used for reference for the const app_payment_gateways = []; array if you want to use it. |
| desc | This provides the customer with a short description of the payment gateway when they select choose "payment method" in the app |
| assetImage | Logo for the payment gateway. This is shown to the customer when selecting a "payment method". New and existing Assets are stored in "/public/assets/images/" |
| pay | This is the function that will will be called if someone selects that payment method. See the "/lib/app/providers/example_pay.dart" file to see an example pay function. |
At the bottom of the file is an example payment gateway
///
//  addPayment(
//      id: 4,
//      name: "MyNewPaymentMethod",
//      desc: "Debit or Credit Card",
//      assetImage: "add icon image to assets/images/myimage.png",
//      pay: myCustomPaymentFunction
//  ),
...
You can uncomment this out to use as a template for your custom payment gateway. You can add multiple payment gateways in this array to build your app how you want it.
Adding payment handler
Create a new file in "/lib/app/providers" and name it as the payment method e.g. paypal.dart
Copy the code in "/lib/app/providers/example_pay.dart" and rename the "examplePay" function name to whatever you like e.g. payPalPay
This file will be used to handle the integration of your new payment method.
///
examplePay(context,
    {required CheckoutConfirmationPageState state, TaxRate taxRate}) async {
  // HANDLE YOUR PAYMENT INTEGRATION HERE
  // ...
  // ...
  // ...
  // THEN ON SUCCESS OF A PAYMENT YOU CAN DO SOMETHING SIMILAR BELOW

  // CREATES ORDER MODEL
  OrderWC orderWC = await buildOrderWC(taxRate: taxRate, markPaid: true);

  // CREATES ORDER IN WOOCOMMERCE
  Order order = await appWooSignal((api) => api.createOrder(orderWC));

  // CHECK IF ORDER IS NULL
  if (order != null) {
    Navigator.pushNamed(context, "/checkout-status", arguments: order);
  } else {
    showEdgeAlertWith(
      context,
      title: trans(context, "Error"),
      desc: trans(context,
          trans(context, "Something went wrong, please contact our store")),
    );
    state.reloadState(showLoader: false);
  }
}
...
We pass parameters into the function to make things easier, the below table explains there uses.
| state | The checkout confirmation screen state Object is primarily used to show/hide the loading screen to let the customer know that something is happening. |
| taxRate | This is the name of the tax rate from WooCommerce that should be applied to the order. |
When the transaction is complete, we then create the order in WooCommerce with the "createOrder" method and then redirect the customer to the order status with a summary of their order.
Uploading to the App Stores
When you are happy with the app, you can check out the below links to help you compile and upload to the app to the app stores.
Developer accounts
- Apple Developer Account - To upload apps on the iOS App Store you'll need an Apple Developer account. Click here to learn out more. Apple charges an annual membership subscription of 99 USD to upload apps for the App Store.
- Google Play Console Account - To upload apps to the Google Play Store you need a Google Play Developer account. Click here to learn out more. Google charges a one-off 25 USD registration fee to upload apps to Google Play Store.
Credits
- Icon's made by Freepik from www.flaticon.com