Introduction
Welcome to the documentation for WP Notify for WordPress!
Here you'll be able to learn how it works and explore the features available.
If you have any questions please feel free to contact us
Requirements
To quickly get set up, you'll need to ensure that you have the below requirements.
WordPress 4.0+
Woocommerce Store 3.5+
Firebase account
Installing the Plugin
Follow the below steps to install the plugin on your WordPress site:
-
Login into your WooSignal account (or create an account if you are new).
-
Once you reach the Dashboard, on the left nav bar look for "Plugins" and click the link.
-
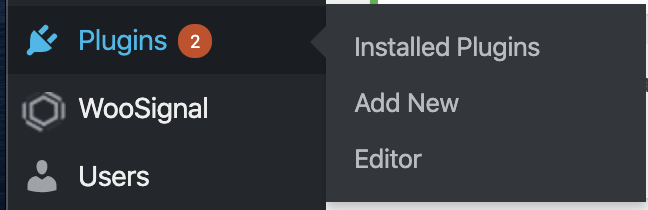
After downloading the plugin, visit your WordPress site and login to get to your admin dashboard. On your nav bar, look for "Plugins" like the below image.
Select "Add New" and proceed to the next step below.
-
Then select "Upload plugin" like the below image

This will open a box below where you can upload a .zip file.
-
Click "Choose file" can look for the WooSignal plugin you downloaded and select the .zip file to install. After you select "Install Now". You should then be able to activate the plugin from your WordPress admin to start using it.
-
If you followed all the steps above you should now be ready to start using the plugin.
API Requests: WordPress
Storing token
Use this method to store a users FCM token into WordPress.
Returns a status code of 200 if the request was successful
[POST]Path /wp-json/wpnotify/v1/token/store
Body Parameters
{
    "token": "fcm token",
    "user_id": "12"
}
Response:
1{
    "data": [],
    "message": "Token stored successfully in WP",
    "status": 200
}
Update token status
Use this method to update a (FCM) tokens status e.g. setting false means the token will be inactive (turn off notifications).
Returns a 200 if a token was updated, use this method to set the current status of a fcm token e.g. 1 = active, 0 = inactive.
[POST]Path /wp-json/wpnotify/v1/token/update
Body Parameters
{
    "token": "203cff6ff4",
    "status": "1"
}
Response:
{
    "data": [],
    "message": "Token updated successfully in WP",
    "status": 200
}
Sending push notifications
Getting started
To get started you'll need a Firebase account, create an account and set up your new project.
You'll need to create an app for each platform e.g. IOS and Android.
Follow the steps to integrate Firebase into the app template, once you've configured everything you can then obtain your Firebase Server Key from Project Settings and add it into your WordPress site.
Dashboard
After you've installed the WP Notify plugin on your WordPress site you'll be able to go the dashboard and configure it.
Go to Settings and then add your Firebase Server key.
Then you'll be able to add FCM devices using our plugin WP Notify for Flutter or through a custom integrate.
Using WordPress Actions
If you need to send notifications through a plugin, we have a WordPress action you can use.
In your package, you can call the below function:
do_action('wp_notify_user', $userId, $title, $desc);
Using this action, you'll be able to notify a specific user and set a title + description.